


Door Edge Pro Installation Instructions
Installing the Door EdgePro
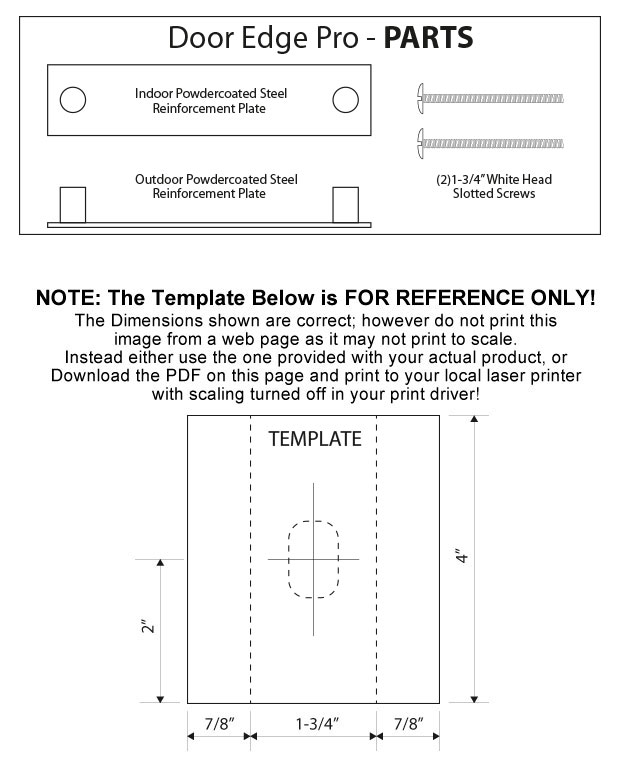
 1. Cut out the installation template printed on this sheet.Position the "+" over the center of the retracted dead bolt on the door.
2. Fold the template at the dotted lines so it lays flat and level on both the inside and outside of the door.
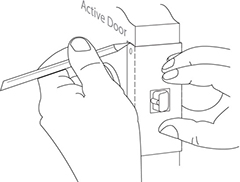
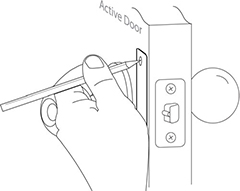
3. With a pencil, mark the top of the template on both sides of the door.
 4. Position one of the Door Edge Pro plates so that the long edge lines up with the edge of the door and the top edge is even with the pencil marks.
5. Holding the Door Edge Pro in place, with a pencil, mark the screw holes on the door. Do this on both sides of the door. Be certain that the Door Edge Pro is positioned properly on both sides of the door when making your screw hole marks.
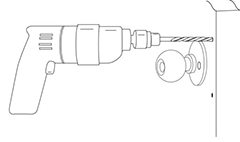 6. With the door closed, starting on the inside of the door, using a 1/4" drill bit, slowly drill into the door at the penciled screw hole marks. Caution: keep drill level and ONLY DRILL HALF-WAY THROUGH THE DOOR.
7. Repeat step 6. on the outside of the door. Drilled screw holes should now be perfectly aligned through the door.
8. Using a 5/16” drill bit, re-drill the holes from the OUTSIDE OF DOOR ONLY to a depth of 1/2” - this will allow the larger diameter studs in the outer half of the unit to be inserted.
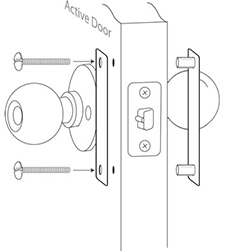 9. Insert the outdoor-half of the Door Edge Pro reinforcement plate (with two protruding studs) into the newly drilled holes on the outside of the door.
10. Position the indoor (flat) reinforcement plate of the Door Edge Pro on the inside of the door over the holes just drilled. Insert one of the 1-3/4” long slotted screws (provided)through the top hole in this plate until the screw threads mate with the adjoining stud in the outdoor plate from the other side of the door and tighten with a screwdriver.
11. Insert bottom screw in the same manner as described in Step 10 and tighten.
Tip on Color Matching
To match the door and trim color, lightly sand all parts and paint.